|
 |
 |
 |
Hit Points: 300
Plasma Shields: 150
Size: Large
Supply: 6
Cost: 350  250 250 
Build Time: 140
Produced at: Stargate
Requires: Fleet Beacon
|
Base Ground Attack: 6
Base Air Attack: 6
Base Armor: 4
Range: 8
Sight: 11
Cooldown: N/A
Production Hot Key: C
|
|
The massive Carriers serve as both command centers and devastating weapons of war. Heavily armored and shielded, the Carrier
mounts no weaponry but instead manufactures and launches flights of robotic Interceptors at vital enemy targets. The
computer-controlled Interceptors are capable of quickly tearing apart even the largest of vessels with their relentless strafing runs.
The Carrier is a powerful and terrifying unit when seen in numbers. While the Carrier itself has no attack ability,
the Interceptors it deploys can be anything from annoying to downright deadly. A group of Carriers are the ultimate Siege Weapon,
utilizing Interceptors to lay waste to anything in the air or ground. Interceptors fly out and attack on their own, but you can
give them targets to destroy by commanding the Carrier to attack (right clicking or using the hot key A
on the target) or by issuing an Attack-Move (using the hot key A and selecting an area rather than
a target to move to). Most of the time, you will want to use the Attack-Move command when using Carriers and saving the right click
(direct unit targeting) command for the most dangerous or threatening units. While the direct unit targeting will kill the selected
target much more quickly, there is a certain amount of delay when the Interceptors leave and enter the Carrier and that slight pause
in between attacks leaves the Carrier vulnerable. If Carriers are group selected and given that kind of command, the pause can come at
the same time for all the Carriers leaving a much larger window for your opponent to use against you. The Attack-Move will generally
leave the Interceptor attack patterns randomized with virtually no delay in attacks.
The Carrier can carry up to 4 Interceptors to begin with, and when given the Capacity upgrade, they can carry up to a maximum of
8 Interceptors. Interceptors are not built with the Carrier and must be produced by the Carrier (use the hot key I
for Interceptor production) and can be queued up for 5 Interceptors at a time. Each Interceptor requires 25 Minerals for production
and if one happens to be destroyed in battle, the Carrier can produce more (up to the limit of 8) as long as there are enough resources.
Other than production, Interceptors do not require any maintenance on your part. Every time they return to the Carrier after an
attack sortie, they are automatically repaired and their shields are recharged. If you do happen to notice that your Interceptors
are damaged, the only way to force the Interceptors back into the Carrier is to have the Carrier retreat (which forces ALL of its
Interceptors to return). However, be wary of retreating if the majority of your Interceptors are healthy or if a strategic target is nearly
dead, since the window of vulnerability swings wide open when the Interceptors begin returning to the Carrier bays.
For the best effectiveness, the Carriers should always be at their Interceptor limit. As mentioned before, Interceptors
can be destroyed in the heat of the battle, and if they aren't replaced the Carrier becomes that much less useful. A Carrier
with no Interceptors is a complete waste of resources and supply units and can easily be destroyed by enemy air-to-air/anti-air units.
When using Carriers to attack, try and keep them above high ground, water, space, ice, etc. where the Carriers are out of ground unit attack
ranges. The Carrier attack range (the maximum distance the Interceptors can fly from the Carrier) of 8 is better than most units and as long as
the Interceptors can reach a given target/enemy presence, there's no need to put the Carrier in any jeopardy. If your opponent has and uses
air units to attack/defend be sure to target them first to give your Carriers the best possibility of retreating from a bad situation.
The downside, however, is that if an enemy comes into your Carrier's attack range, your Carrier will automatically acquire the target and begin moving
towards it. If you become careless with your Carrier control, you enemy can easily lure idle Carriers into traps and ambushes without any damage or
loss while you lose a potentially powerful weapon. If you do have to leave your Carriers at a certain location (perhaps to intercept
enemy expansion attempts or sneak attacks), be sure to use the Hold Position command (hot key
H with Carriers selected) to prevent your Carriers from wandering.
In addition to their great attack range, Carriers also have a long sight range (11 units). This can be both helpful and problematic
depending on the situation. Obviously for attacks, the long sight range will allow you to attack the enemy before they can see you and
overall will help you destroy your enemy at best and cause confusion at least.
The Carrier also has the ability to "stack" when in groups. This can also be an advantage or a disadvantage depending on the situation.
Stacked Carriers in large groups have a concentrated field of attacking Interceptors and can make it near impossible for your enemy to
select any units caught beneath them or even select the Carriers themselves. This can be a great advantage during a siege and should be
used in most cases. However, if you opponent has units with special abilities or area-effect attacks, stacked Carriers can be heavily
damaged in a very short amount of time. Examples include High Templar casting Psionic Storm, Defilers casting Plague, Queens casting
Ensnare, Science Vessels casting EMP Shockwave, etc. Large groups of Corsairs, Archons, Mutalisks, Devourers, etc. with their area-effect
damage attacks are also deadly. If your opponent shows any signs of utilizing those counters, be very cautious with your Carrier attacks,
and let them spread out if possible.
As recommended with the Scouts, you will always want to keep at least one Observer with your Carriers (although the more the merrier) since
they have no detection abilities of their own. This will prevent Cloaked Wraiths or Arbiter cloaked Protoss units from making easy targets
out of your Carriers. Again, you should use the Observer "link" tactic (select an Observer and right-click on one of the Carriers) to have
an Observer follow your Carriers wherever they go without further management (unless you issue another command to the Observer).
Like any other unit in StarCraft, Carriers function best when supported by other units (for a more balanced force). Dragoons and Scouts
always make excellent support units, but if you're lacking in resources, you may wish to resort to Zealots and Corsairs to defend against
both air and ground targets.
One thing to remember when using Carriers is that when they are destroyed, all of the Interceptors associated with that Carrier self destruct
along with it. Once those Interceptors are destroyed, depending on the Carrier fleet size, you can lose a significant advantage in battle.
Therefore, be sure to keep your Carriers' shields full with Shield Batteries and never hesitate to retreat if the Carrier begins taking heavy
damage. If the damage is severe, the best method of retreat is to use the Arbiter Recall ability on your Carrier fleet. This will instantly
teleport your fleet to the Arbiter's position and hopefully out of harm's way.
Finally, with Brood War, the balance between the aerial units can best be defined by the .
|
|
|
[ Click to Enlarge - 79 KB ]
Scouts and Corsairs support Carriers with an attack on a Terran base...
|
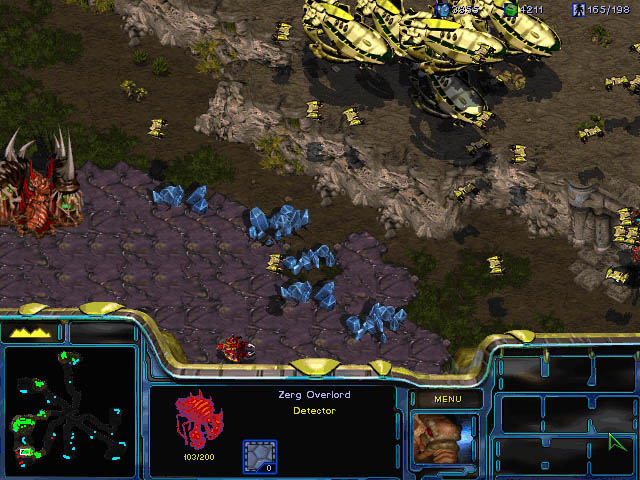
[ Click to Enlarge - 98 KB ]
...Carriers can always use added support in fighting both land and air targets.
|
|
|
|
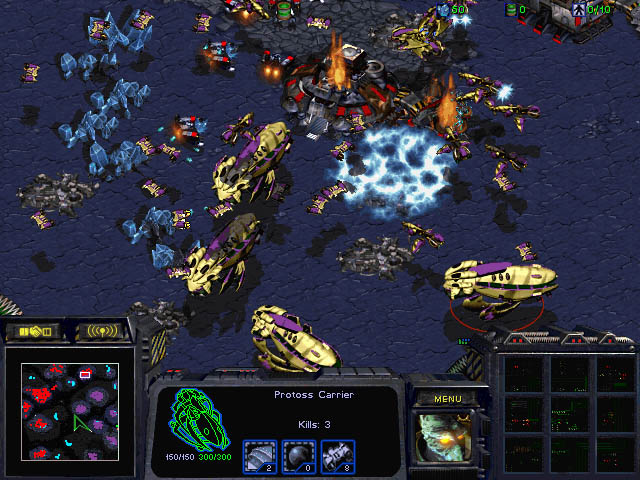
[ Click to Enlarge - 106 KB ]
While Carriers are great on their own in large numbers, Psionic Storm can be used to help them out.
|
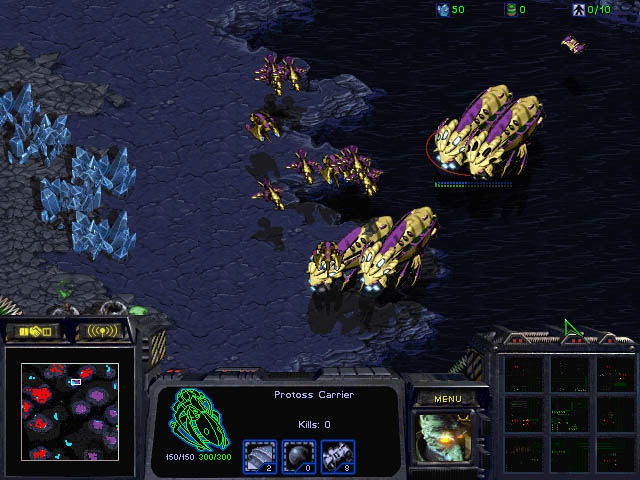
[ Click to Enlarge - 98 KB ]
Carriers can use high ground to their advantage, staying both out of sight and range from any ground
attack units.
|
For any race, if you can force enemy Carrier(s) to move from a standstill position, it will cause any Interceptors the Carrier(s)
may have to return to the Carrier which leaves it vulnerable to attack. At that point you can attack them
with any air-to-air/anti-air units you may have without worry of counterattack, at least until the Carrier(s) come to a stop to redeploy
their Interceptors.
Terrans
- Use EMP Shockwave with Science Vessels to completely deplete Carrier Shields.
- Cloaked Wraiths can dispatch Carriers that don't have detection nearby.
- Use Yamato Guns with Battlecruisers to quickly even the odds.
- Valkyries can counter Carriers if they have an advantage in numbers.
|
|
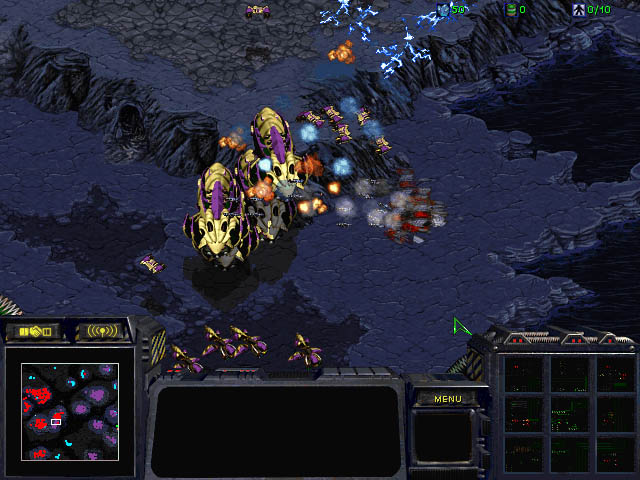
[ Click to Enlarge - 75 KB ]
Cloaked Wraiths attack a group of Carriers.
|
Protoss
- Use Psionic Storm with High Templar to heavily damage stacked Carriers.
- Use Mind Control with Dark Archons to make your opponent's advantage yours.
- Scouts escorted and cloaked by an Arbiter can quickly destroy Carriers.
- Large groups of Corsairs using Hit and Run tactics can kill Carriers.
Zerg
- Hydralisks covered by Dark Swarm can quickly destroy Carriers (be sure to target the actual Carrier immediately).
- Devourers in large groups can withstand the punishment from Interceptors with their heavy armor as well as deal significant damage to the actual Carriers; best used if supported with Mutalisks.
- Use Plague with Defilers to reduce the Carrier HP.
- Use Ensnare with Queens to slow Carrier movement.
- Use Parasite with Queens to keep track of Carrier movement.
- Use groups of Scourge to destroy the Carrier.

|
Air Weapons
Level 1 -
100  100
100 
Level 2 -
175
175
Level 3 -
250
250
|

|
Air Armor
Level 1 -
150
150
Level 2 -
225
225
Level 3 -
300
300
|

|
Plasma Shields
Level 1 -
200
200
Level 2 -
300
300
Level 3 -
400
400
|

|
Carrier Capacity
100
100
+4 Max Interceptors
|
Air Weapons -
Each upgrade adds +1 per upgrade for a total of +3 with all three upgrades.
Air Armor -
Each upgrade adds +1 to Armor for a total of +3 with all three upgrades.
Plasma Shields -
Each upgrade adds +1 to Shields for a total of +3 with all three upgrades.
Increase Carrier Capacity -
A must have upgrade. As soon as the Fleet Beacon is completely warped in, (if the plan is to make Carriers) research this
upgrade, even before you have any Carriers. The difference between having 4 or 8 Interceptors is significant.
Online Privacy Policy
Battle.net Terms of Use Agreement
©2019 Blizzard Entertainment. All rights reserved.
|