|
 |
 |
 |
Hit Points: 40
Size: Small
Supply: 1
Cost: 50 
Build Time: 20
Produced at: Hatchery
Requires: Hatchery
|
Base Ground Attack: 5
Base Air Attack: N/A
Base Armor: 0
Range: 1
Sight: 7
Cooldown: 22
Production Hot Key: D
|
|
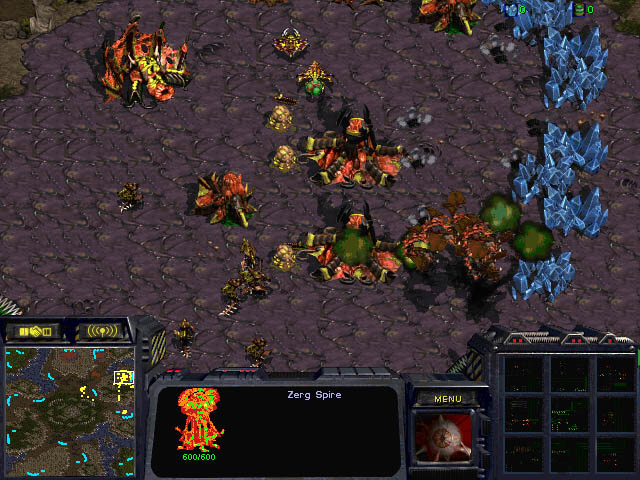
Like the Larvae from which they hatch, Zerg Drones contain within them the
genetic code required to morph into any of the large Zerg "buildings", which are actually living
(but immobile) structures. They can only grow on areas where the Creep has established itself, as
they require its nourishment and building material. The Drones also harvest any raw materials that
are needed. Vespene gas is very important to the Zerg: the high energy state of the gas powers their
accelerated metabolisms and is essential for the production of the more advanced Zerg breeds.
Using the Burrow Ability
The Zerg Drone has one major advantage over the Protoss Probes or the Terran SCVs, and that is the
ability to Burrow. Before a Drone can use this ability, Burrowing must first be evolved at one of the
Hatcheries/Lairs/Hives. Since Drones are relatively weak attackers, Burrowing Drones for ambushes
is almost never a good idea. However, Burrow can become very useful for the Drones when an enemy force
comes pouring in. By Burrowing the Drones, you can give them the chance to survive until reinforcements
arrive, or until the enemy has the ability to detect the Burrowed units. Should you repel the attack,
you can quickly unburrow all of the Drones and resume resourcing immediately.
|
|
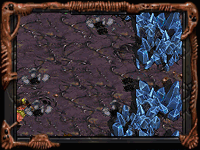
[ Click to Enlarge - 95 KB ]
|
In the case of an attack, the fastest way to quickly Burrow your Drones is to either double-click a Drone or hold
down Ctrl while left-clicking on a Drone (this will select up to 12
of the Drones onscreen) and then hitting the U key to Burrow all the
selected units. With practice, you should be able to quickly get your Drones out of harm's way, giving
your warrior units more fighting room to repel an attack.
The Zerg Drone contains the genetic template to morph into any of the basic Zerg
structures. As the colony moves up the evolutionary ladder, the Drone is infused with
additional genetic code to morph into more advanced structures.
The key difference between the Zerg method of colony construction and the Terran or Protoss methods
is that the Drone actually morphs into the structure. The Drone can be recovered during the
morphing process if the structure is canceled, however once the structure is completed, the
Drone is permenantly lost. Note, however, that the once the Drone enters into its morphing
stage, the control for the Drone is no longer needed and a few interesting strategies have
arisen with this particular property. [ For details, check out the Basic
Strategies section. ]
One of the side effects of this type of colony construction is that the Zerg constantly
need to replenish their Drone supply to maintain a balance between resourcing and tech
tree advancement. Should Drone replacement ever be neglected (especially in the early
game), the Zerg can find themselves either climbing the tech tree too slowly, or having
too few Drones gathering resources.
Another key difference between the Zerg means of construction and those of the Terrans or Protoss
is that the Creep limits where the Zerg can place their structures. Although this is not
usually a problem, the dependence on Creep does present a few obstacles for Zerg advancement. Creep Colonies
are almost always required at a main Zerg base to provide enough room to build all the
necessary defenses and tech tree advancing structures. In an expansion situation, the
Zerg MUST build a Hatchery first and thus are unable to fortify the position before expanding.
This can leave the Zerg vulnerable during expansion attempts so be sure to bring an
escort along to fend off enemy strikes.
 |
 |
The Drone is capable of mining both minerals and Vespene gas. To gather minerals, just right-click
on a mineral cluster with the Drone and it will automatically begin resourcing. Each mineral cluster
can only be mined by one Drone at a time. If only one Drone is assigned to a particular cluster, it
will mine only from that cluster. However, having only one Drone per mineral cluster isn't the best
ratio for mineral gathering -- usually you will want to have at least 2-3 Drones per cluster to get the
most out of the minerals (however, depending on the distance of the Hatchery from the clusters, you may
want more or less). Note that there can be too many Drones mining at one time and those Drones that are
unable to access a Mineral cluster will usually just end up sitting idle until a cluster frees up. With
experience you should be able to find optimal numbers for mineral clusters for a particular resource area.
In the case of Vespene gas, an Extractor needs be built on top of the mine before Drones can collect from it.
Once the Extractor is completed, just right-click on it with a Drone to begin collecting the refined Vespene
gas. The number of Drones you'll want gathering from a mine will depend on the distance between the mine and
the destination Hatchery. Note that although only one Drone can be inside the Extractor at a time, 3-4 Drones
set to gather from each nearby Extractor will usually offer maximum efficiency. The general
rule of thumb is to keep adding Drones to the Vespene gas Extractor until only one Drone waits outside at any
given time. If more Drones begin waiting around the Extractor, then those additional Drones provide no improvement
in the rate of Vespene gas harvesting.
As with the Terrans and Protoss, if you plan to build quickly up the tech tree, you will need to concentrate
more on Vespene gas collection early in the game, since that is the slowest incoming resource. If you plan
for a rush or other low-tech tactic, you will want to concentrate more on gathering minerals, since the lower
tech units and structures are more mineral dependent.

|
Burrow
100  100
100 
|

|
Carapace
Level 1 -
150
150
Level 2 -
225
225
Level 3 -
300
300
|
Burrow -
Using the Burrow ability Drones will be able to hide from more powerful enemies.
Carapace -
Each upgrade adds +1 to the Carapace for a total of +3 when fully upgraded.
As mentioned earlier the Burrow ability can be extremely helpful to your Drones during an early game invasion --
if you have the resources available, you should evolve it as soon as the chance arises. While the Drone
can attack and defend, it is a fairly weak unit and although the Carapace upgrades may help a little, they
will rarely make a difference in a battle as far as the Drone is concerned.
Online Privacy Policy
Battle.net Terms of Use Agreement
©2019 Blizzard Entertainment. All rights reserved.
|