|
 |
 |
 |
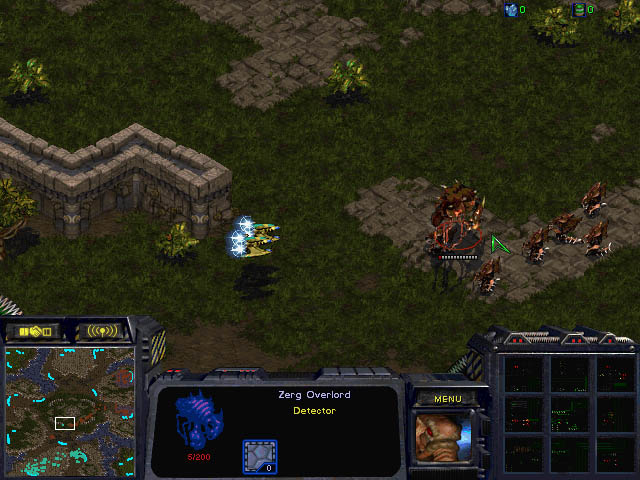
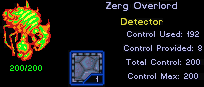
Hit Points: 200
Size: Large
Supply: N/A
Cost: 100 
Build Time: 40
Produced at: Hatchery
Requires: Hatchery
|
Base Ground Attack: N/A
Base Air Attack: N/A
Base Armor: 0
Range: N/A
Sight: 9 (11 with upgrade)
Cooldown: N/A
Production Hot Key: O
|
|
The extent of the Overlords’ control over the Zerg is unknown, but it is clear that these flying behemoths
provide direction for the other Zerg breeds. Although they resemble the Portuguese man-o-war of Earth, they
are fairly docile creatures that tend to young larvae and transport other Zerg across the depths of space
by carrying them within their shelled bodies.
With the ability to transport, detect cloaked/burrowed units, fly and provide "supply" units for
the Zerg, the flying Overlord is one of the most useful and versatile Zerg units. The key to winning most
battles will lie in the utilization of every ability the Overlord has to offer. Once those abilities are
mastered, the Zerg can truly become a race to be feared.
Control/Supply Issues
As the provider of control and direction for the Zerg breeds (similar to the Terran Supply Depots or the Protoss
Pylons in terms of "supply"), producing many Overlords is a requirement for colony growth.
|
When selected an empty Overlord will list Control used, Control provided, Total Control, and Control Max
(which is usually 200 - except in Team Melee games where the maximum may be higher) numbers.
[ Note that these stats can be seen at all times at the top right hand corner of the screen. ]
|
One of the major drawbacks of the Overlords is that compared to the Supply Depots or Pylons,
Overlords are rather weak and vulnerable, and if left unescorted, can be easily destroyed. Because of this, Overlord
Hunting often becomes a viable tactic for enemy forces. 8 control(supply)
units are lost with every Overlord lost and untimely losses of Overlords will quickly put a cap on population growth.
This can become a serious hindrance if it happens in the early game (particularly from Terran Marines), where there
aren't enough resources to build an army and maintain an excess of Overlords, so be sure to protect them well. In the
later game, be sure to have excess Overlords so that if a few are picked off, the colony will still be able to grow.
Maximizing Detection
Another highly valued function of the Overlord is its ability to detect cloaked or burrowed units. With the relatively
large number of Overlords that you will have for maintaining control of the Hive, there should never be a problem defending against or
attacking those cloaked/burrowed units. If using Overlords as part of an attack force, bring along more than one. The enemy may
directly target the Overlords in order to reduce your detection ability, and using multiple Overlords to witness a fight will
help counter this tactic. Without any detection nearby, enemy cloaked units will be able
to engage your own forces undetected. In most cases a single Overlord will not suffice and the more present, the better the
chances of a successful attack. To maximize the ability to detect, be sure to evolve the Overlords for Pneumatized Carapace
(faster movement upgrade) and Antennae(increased sight range).
Transportation
Finally, the Overlord's ability to transport comes once its genetic code has been evolved for Ventral Sacs.
The Overlord, like the Dropship and Shuttle, has 8 transport slots and can carry:
8 Drones (1 slot each)
8 Zerglings (1 slot each)
4 Hydralisks (2 slots each)
2 Lurkers (4 slots each)
4 Defilers (2 slots each)
2 Ultralisks (4 slots each)
OR any combination of these units up to but not over the 8 slot limit
With the abundance of Overlords that should be present by the time Overlords evolve Ventral Sacs, the
sheer number of units that can be transported at any given time becomes quite intimidating. Use this to your advantage and
overwhelm enemy bases with large "drops" at a location that they may least be expecting. Be careful with the approach
when using large numbers of Overlords to drop, since if spotted, the enemy will mostly likely figure out what is coming
and may have enough time to ready a defense. If possible, take unusual routes to the enemy to minimize the chance
of being seen. Note that the Pneumatized Carapce (faster movement upgrade) is almost required for successful drops.
 Load
Load
There are 4 different ways to load units into your transport capable Overlord:
- Select the Overlord, click on the Load button, then click on the ground unit to load
- Select the Overlord, hit the L keyboard shortcut for the Load command, then click on the unit to load
- Select the Overlord, then right-click on the unit to load
- Select the unit to load, then right-click on the Overlord
Group selecting is possible with all 4 methods, as is command queueing using the Shift key.
The best method to use will depend on the situation, though practicing the different methods will allow you to quickly load your
units in any situation. (one very useful method is to select a group of ground units, hold down the Shift key, then right click on
one Overlord at a time. Your units will load into the first Overlord as space provides. The remaining units will then load into the next
Overlord. This will continue until all units are loaded).
 Unload
To Unload your Overlord, either:
Select the Overlord, issue the Unload command (either by clicking on the Unload button, or using the U keyboard shortcut) then select the drop location. The Overlord will move
to the target location and unload all its units.
OR
Select the Overlord, then click on the wireframe of a single unit you wish to unload. That unit will then be unloaded directly under the Overlord's current position.
|
|
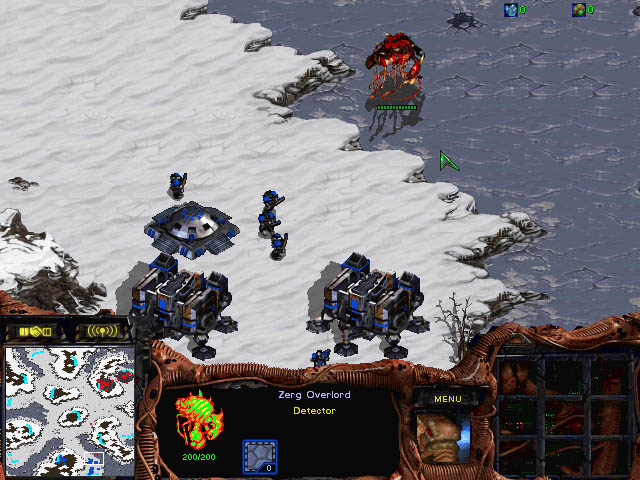
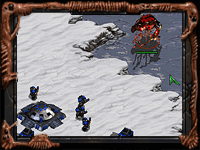
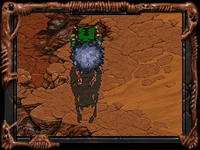
[ Click to Enlarge - 90 KB ]
An Overlord watches the outskirts of a Terran outpost.
|
Use every opportunity to hunt down and destroy Overlords should they happen to fly astray
or be left unguarded. By doing so, you reduce the Zerg control/supply, limit their detection
abilities and destroy any possible means of transport (and any units they might be carrying).
Terrans
- Use Marines to quickly dispatch any scouting Overlord early in the game. For the best results, position your Marine(s) directly below
the Overlord before attacking so that your Marine(s) do not waste time having to walking up or chasing after the Overlord.
- Goliaths, with their explosive air attack, can deal serious damage to Overlords.
- Use cloaked Wraiths to quickly dispatch the Zerg means of detection. If attacking or defending against a Zerg force accompanied by Overlords,
kill the Overlords first and cloaking will give you the distinct advantage when attacking the rest of the force.
- Valkyries can quickly destroy packed groups of Overlords in an alarmingly short amount of time.
- Science Vessels with Irradiate are probably the Overlord's worst enemy. Once infected with an Irradiate, the Overlord is as good as dead (unless
a Medic uses Restoration to save it).
|
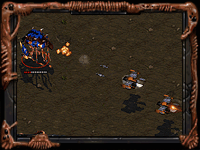
|
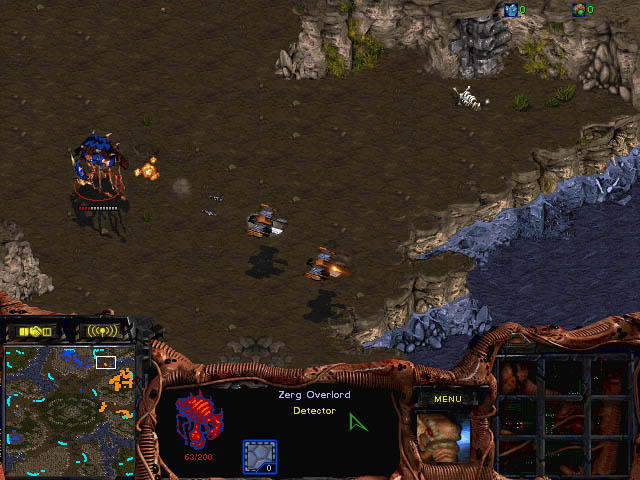
[ Click to Enlarge - 81 KB ]
Wraiths go Overlord Hunting.
|
Protoss
- Dragoons can be used to destroy Overlords, but with their long cooldown times, be sure to position the Dragoons below the Overlords
before attacking to get the kill before they can escape.
- Corsairs are probably the single best anti-Overlord solution. With a group of 5 or more Corsairs, Overlords are easy prey, whether
they're alone or in groups.
- Scouts deal incredible aerial damage and are another prime choice for Overlord Hunting. If outfitted with weapons and speed upgrades,
the Scouts can put a quick end to any Overlord.
|
|
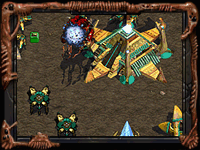
|
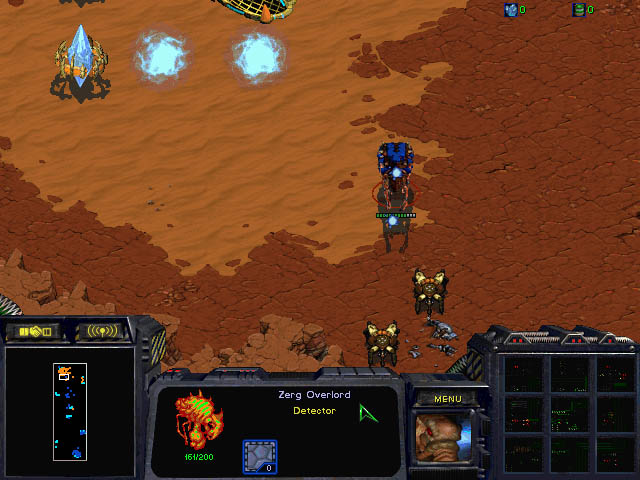
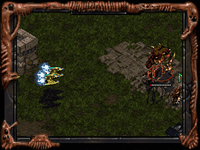
[ Click to Enlarge - 115 KB ]
Two Dragoons trap and fire on a spying Overlord.
|
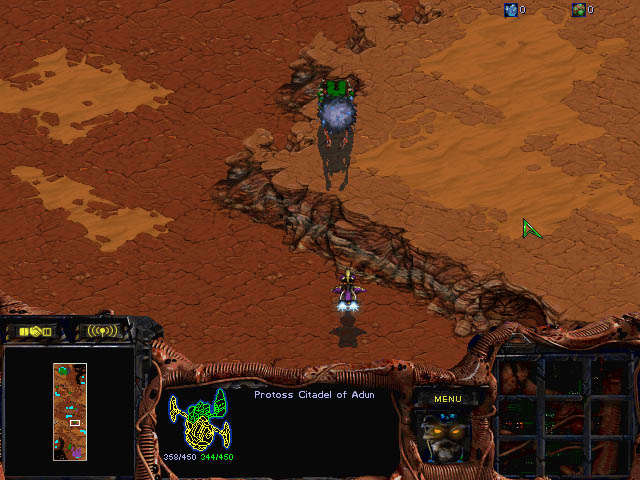
[ Click to Enlarge - 68 KB ]
Two Dragoons prevent an Overlord from spying on the Protoss town.
|
|
|
|
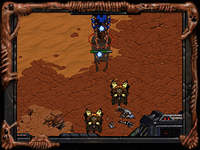
[ Click to Enlarge - 75 KB ]
A Scout chases down an Overlord.
|
[ Click to Enlarge - 77 KB ]
Two Corsairs seek to destroy a criticialy wounded Overlord.
|
Zerg
- Hydralisks are the early game solution for Overlord Hunting. Be sure to position them below the Overlord before attacking
to get the most out of the attack.
- A pair of Scourge is all it takes to destroy an Overlord. Use them to quickly clear out lone scouting Overlords.
- Packs of Mutalisks can quickly destroy lone Overlords, and are even better against packs of Overlords.

|
Ventral Sacs
200  200
200 
Transporting for Overlord
|

|
Antennae
150
150
Increase Overlord sight range
|

|
Pneumatized Carapace
150
150
Faster Overlord movement
|

|
Flyer Carapace
Level 1 -
150
150
Level 2 -
225
225
Level 3 -
300
300
|
Ventral Sacs -
This upgrade will allow your Overlords to act as a transport for ground troops.
Antennae -
The added sight range is useful in exploring enemy bases at a safe distance, as well as for spotting Cloaked or Burrowed units.
Pneumatized Carapace -
This speed upgrade is a an extremely useful evolution for the Overlord. Not only does it provide for faster transportation, the
Overlord will also have a better chance of escaping from a fatal situation.
Flyer Carapace -
Each upgrade adds +1 to the Flyer Carapace for a total of +3 when fully upgraded.
Online Privacy Policy
Battle.net Terms of Use Agreement
©2019 Blizzard Entertainment. All rights reserved.
|