Quick Map Exploration
In the early game, the key element before actually attacking or defending is to scout with an early Probe (your 7th Probe or earlier) and
find the enemy as quickly as possible. Once the enemy base is found, take a quick glance to analyze their build order. During this time,
you might try distracting the enemy workers with either hit and run tactics or by building an Assimilator atop the enemy Vespene Gas mine (if you
have enough Minerals to pull it off). The Assimilator tactic is riskier but can be much more effective for distraction. Either way, if you are
successful in distracting your enemy, you can gain a crucial advantage in Mineral production early on and have a better chance with a successful rush.
The Zealot Rush
The biggest threat from Protoss players during the first few minutes of a game comes in the form of the Zealot. The most obvious tactic
at this stage of the game is to build the most Zealots and just overwhelm the enemy, a.k.a. "The Zealot Rush". For this type of strategy, you'll
want at least 3-4 Gateways, all Probes mining Minerals and Pylon construction ahead of the production curve to pump out the Zealots as quickly as
possible. Be sure to have scouted before you try the rush for the best results.
The rush can be pushed in two ways: hit early or hit hard. If the enemy looks to be building an early Forge or Cybernetics Core instead
of multiple Gateways, you will want to go with the "Hit Early" tactic and send your first 2-3 Zealots to attack as soon as possible. Once
your Zealots reach the enemy base, take a roundabout path to avoid being seen by the enemy and hit the mining Probes as quickly as possible.
If you do manage to make it into the mining operation, your opponent will probably have noticed the Zealot presence and begin counter attacking
with their Probes and any available Zealots. Ignore the enemy Zealots (unless you outnumber them) and concentrate on destroying as many
Probes as possible. The best method for this would be to queue up the attack order by group selecting your Zealots, right-clicking on an
enemy Probe to initiate the attack then holding down Shift and right clicking on up to 12 more Probes
(click on the closest ones first). This will keep your Zealots from being distracted by enemy Zealots as well as making the Probe-killing
happen as quickly as possible. Hopefully you will have remembered to keep up the Zealot production at your home base during this encounter,
and if so, continue to stream down your Zealots in pairs or quads to keep the pressure on.
If your enemy looks to be building multiple Gateways, you may want to go with the "Hit Hard" tactic and wait until you have 6-8 Zealots
before attacking. Once you reach the enemy base, use the same tactic as above to shut down your opponent's resources as quickly as possible
and be sure to keep producing Zealots at your Gateways. With the "Hit Hard" tactic, the victor will usually be the player that has the most
Zealots, so be wary of engaging if you notice that your opponent has more Zealots than you do.
One more thing to remember when using a Zealot Rush is the distance between your base and your opponent's. The longer it takes for your Zealots
to reach the enemy, the longer he/she may have to produce more Zealots or set up defenses. Typically, the Zealot Rush becomes less effective
the larger the map is. Also if the map is an "island" map, the Zealot Rush (as described above) is useless.
Early Game Alternatives
If you know that your opponent isn't likely to rush or if you just feeling lucky, you may want to try alternative early game tactics.
One of the more successful tactics is to go straight for Photon Cannons and build a quick defense. When
using this strategy, you'll need to get a Forge as quickly as possible and concentrate on increasing Mineral production early on. Be sure to
have redundant Psionic power grids for your Photon Cannons by building the Cannons in the overlapping auras of two or more Pylons. This will
prevent your opponent from shutting down your entire defense by destroying the one Pylon that might be powering all your Cannons. The placement
of these Cannon barriers will depend on the layout of the map around your base. If you have one or two choke points nearby, clog them up with
Pylons and Photon Cannons. On most maps, these will be a fair ways from your Nexus so if you enemy manages to squeeze Zealots past this type of
defense, you may be in trouble since your Nexus and Probes will be particularly vulnerable. If your base has no nearby choke points or is open
on all sides from land attack, you should place your Photon Cannon defense close to your Nexus and Probes and in a tight cluster so that they
can defend the entire base from attack. Usually, these quick Photon Cannon barriers will be able to deter a Zealot rush (particularly if they
completely clog up a choke point) and give you the time you need to travel up the tech tree much more quickly.
Another alternative, though even more risky, is to go straight up the tech tree to either Dark Templar or Shuttles/Reavers. If micromanaged
with a solid build order, you should be able to get one or the other unit type in under 10 minutes at which point you should be able to destroy
your enemy with ease (depending on which tech path they chose). Dark Templar in a group of 3-4 early on can easily destroy an enemy colony and
Reavers can be absolutely devastating if micromanaged well. A solid Photon Cannon defense can deter this type of attack, but other than that,
you may find yourself with an easy kill. But as mentioned, this tactic is fairly risky, particular in a small map land game. Not only does
it leave you practically defenseless during the build up the tech tree, it also requires a lot of Vespene Gas to be pulled off successfully (for
either unit type, Dark Templar or Reavers). So use this tactic sparingly.
|
Offensive Photon Cannons
Offensive Photon Cannons are a very risky tactic, but if successful, you will be able to demolish an enemy before they realize what's happened.
It involves building the Forge and scouting with your Probe for the enemy as early in the game as possible. You will need to concentrate
all your mining efforts on Minerals only to ensure that you'll be able to finance this effort. Stealth is of the absolute importance
and you have to make sure your Probe is not seen while scouting. Once you do discover the enemy base, move around to the "back" of the base near
the Minerals and Vespene Gas mine.
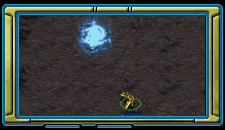
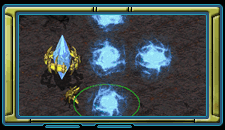
Begin warping a Pylon about 2 units outside of a Photon Cannon's range from the Minerals or Gas Mine. Once the Pylon is up,
begin warping in Photon Cannons around the Pylon (as close to the Pylon as possible) and continue to build Photon Cannons and Pylons closer to the
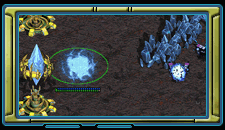
enemy mining operation. The key is not to let the enemy know of your presence until you have 3-4 Photon Cannons set up. This ensures that once
the enemy does find you, the rear Photon Cannons will be able to fend off any counter attack. Once you have 4+ Cannons
up and they've begun attack the enemy base, you'll know that the tactic was successful.
If caught unawares, any defense your opponent begins to set up afterwards will be too late to save the mining operation and you should be able to
crush them by continuing to inch closer to the enemy structures with more Photon Cannons. Terrans have the ability to lift off their Command Center
and fly away, but that in itself should give you a distinct advantage in resource production and at that point you can use a Zealot to track down the
escaping structure and finish it off when it does land. The Protoss and Zerg have almost no means of defense against it if it is pulled off and a
successful Offensive Photon Cannon operation almost always guarantees victory.
|

|
|
[ Click to enlarge - 94 KB ]
|

|
|
[ Click to enlarge - 95 KB ]
|

|
|
[ Click to enlarge - 108 KB ]
|
Unit Combinations
Once you make it past the early game rushes and build up, the types of units at your disposal becomes more varied and using units in combination
should become a higher priority. The key to unit combinations lies in a good balance of attack power and range as well as formation. For a well
balanced force, use Melee/Short Range attack units (Zealots, Dark Templar, Archons, Corsairs) to spearhead the attack, escorted with
Support/Mid-Range attack units (Dragoons, Scouts, Carriers) and if available, followed up by Long Range
attack units (Reavers, High Templar using Psionic Storm, Dark Archons using Maelstrom or Mind Control).
Use your Melee units to engage and tie up an enemy force as well as take the brunt of the attack, giving your support and long range units time to quickly
dispatch the enemy while remaining relatively unharmed. The Support units serve a two-fold purpose by being the center of the force, first, they can
take advantage of an attack centered on the Melee units by getting free hits on the enemy from a distance, and two, they can protect both the Melee/Short
Range Units as well as the Long Range units at the same time from aerial attack. The Long Range units will most likely be your opponent's major worry
(since they are usually the most powerful and can cause the most damage) so be sure to keep them as far from the heat of battle as possible to ensure
that they'll live long enough to cause the most damage.
Using the power and range to your advantage like this, you'll find that your forces will generally last longer.
The Reaver Pop
The Reaver Pop is essentially the same thing as a Reaver Drop but with more micromanagement. It involves using one or two Reavers in a
Shuttle and "popping" them in and out of the Shuttle for attacks and for hiding while reproducing the Scarabs needed for attack. With the cooldown time between
being dropped and being able to fire, the Reaver shouldn't be dropped in the middle of a heated battle. Drop your Reaver(s) just out of an enemy force's
attack range to give the Reaver time to wait through the cooldown cycle and then launch a Scarab. Immediately queue up a Scarab to replace the one fired
(by using the hot key R) and pop the Reaver back into the Shuttle before the enemy units can come within their attack
range. (By popping the Reaver back into the Shuttle before the enemy can attack, the enemy will stop once their acquired target is "gone" unless they've
been commanded to attack the Shuttle itself). Fly a little past the enemy attack range
and pop the Reaver out and launch another Scarab. Continue to do this over and over until the enemy ground force is destroyed, or until your Shuttle
or Reavers are in need of a Shield Recharge. The faster you get with the Reaver Popping, the better your results will be but it does take a little
time and practice to make it work well. The one thing to worry about when using this tactic is the condition and position of the Shuttle. If you allow it to get
destroyed, you may lose the Reavers inside in the worst case, or your Reavers may get stranded in the battlefield at best. As for position, try and
keep the Shuttle behind the Reavers during the engagement so that the enemy units will not acquire it as a target. Experience will teach you
when you should retreat, but if used properly, this tactic can be devastating to an enemy ground force.
Psionic Storm Aiming
One of the most important skills to learn with the Protoss is learning where to aim a Psionic Storm with the High Templar. First of all, you should
get to know the attack ranges of the units being used against you in a game. Once you get a good feel for how far a unit will be before it will attack,
you can then have a good idea of where to cast a Psionic Storm.
The easiest situation is when your unit(s) are already engaged with enemy units, at which point all you have to do is cast the Psionic Storm right on
top of the enemy. This requires very little skill and is an obvious use for Psionic Storm.
For better results, plan ahead with your Psionic Storm use so that you can lay traps for your opponent(s) and do maximum damage with the ability.
Learning to "lead" your Psionic Storm casting is one of the essential elements of successful Psionic Storms. "Leading" involves casting the Storm
over an area where your enemy WILL be just after the cast. Timing is very important when you "lead" your Storms, but with experience, you can catch units
on the move and damage them from the point when they enter into the Storm until they escape out of it. The easiest way to set up a successful "lead"
Psionic Storm is by luring the enemy units with a quick hit and run using Zealots or Dragoons or Scouts, etc. Then as your units lead the enemy into
the Storm range, immediately stop your units and cast the Psionic Storm over the area where the enemy units will begin engaging your units (right at
their attack range). Not only will this affect the units just as they're entering the Storm, they will also stop right under the Storm to begin attacking
your units. This should keep the enemy within the Storm effect throughout its entire duration causing the maximum possible damage as well as keeping
the time that your units are taking damage to a minimum. But again, timing
is everything and wait til the last second before casting to ensure that your opponent doesn't see through the trap and retreat before walking into it,
wasting the Storm. As with the Reaver Pop, this skill requires practice and experience to be used well, but once you get the "feel" for it, you will
be able to wreak a lot of havoc with your High Templar.