|
Overlord Drop Description
The Overlord Drop can be a deadly weapon for the Zerg. In many situations a massed Overlord
drop of combat units can turn the tide of a losing battle or turn a vicious stalemate into a decisive victory. This
strategy is particularly viable for the Zerg since they usually have the most transport units during any one game.
The large number Overlords that are required for growth of a Zerg brood become transports once the Ventral Sacs
upgrade is researched. Overlord Drops can be used to overwhelm a defensive set up, flying past enemy lines and
dropping an enormous force right into the heart of the enemy base.
|
|
|
[ Click to Enlarge - 105 KB ]
|
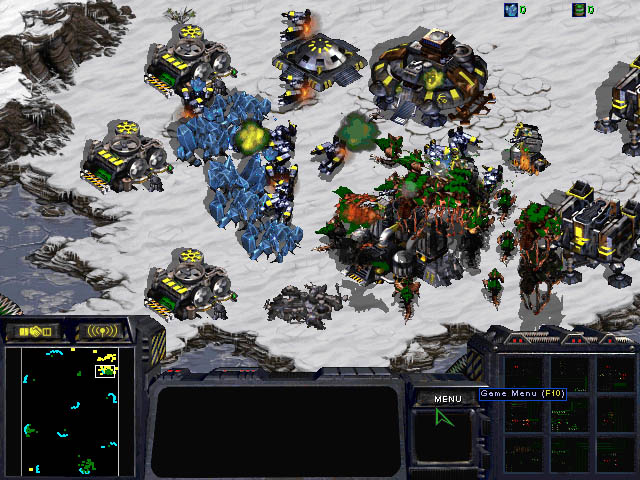
Overlords can fly into an enemy base from almost any angle and this ability should used to its full extent.
Many players try to use the terrain to their advantage by setting up extensive blockades on ramps to high
ground or across bridges. In these cases, Overlords can be used to completely bypass those defenses.
By dropping from the rear of an enemy base or some other unexpected position, the Zerg can quickly ravage
an enemy base before the defenders even realize what is happening.
For details on what the Overlord can transport, check the Overlord
Unit Page.
|
|
|
[ Click to Enlarge - 108 KB ]
|
[ Click to Enlarge - 113 KB ]
|
|
|
|
[ Click to Enlarge - 79 KB ]
|
[ Click to Enlarge - 105 KB ]
|
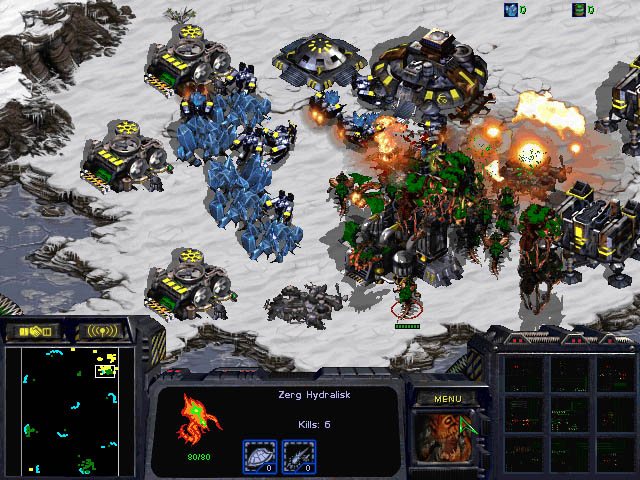
The Overlord Drop tactic works best when the attack comes as a complete surprise. If the enemy
spots your preparations, quite formidable counters can often be deployed. Even when the enemy
knows about the imminent attack, using Overlords to transport your forces could still be more effective
than charging a strong defensive line. Be ready to abort the attack and unload your ground troops in the
event a strong air force shows up. Losing a strong ground force while loaded into an Overlord can be a
crushing blow to your chances of victory.
|
Double Lair Upgrade
If you plan on using the Overlord Drop as early possible, the fastest way to achieve the ability
is to make two Hatcheries. Once your Spawning Pool is complete, then upgrade both Hatcheries
into Lairs. Once the Lairs are complete, simultaneously begin to evolve both the Pneumatized
Carapace (faster movement upgrade) and the Ventral Sacs (transport ability). This will quickly give
your Overlords both the transport ability and speed they need to successfully accomplish a Drop
on the enemy. When the upgrades finish, you should have a group of Hydralisks ready to go. To
save time, position both your Overlords and Hydralisks as close to the enemy as you dare.
|
|
|
[ Click to Enlarge - 95 KB ]
|
Executing the Overlord Drop
The first and foremost element of a devastating Overlord Drop is early reconnaissance. You'll
need to find the enemy base and determine the best entry point for the drop. Take advantage
of any favorable terrain available to you. A nearby undefended ridge of high ground can provide
your units with a clear advantage over the defenders below. If the terrain does not provide one
clear area to place your forces, you can then consider a Drop much closer to the enemy.
Find the area that is the least defended from air attack and use that area as your target
Drop location. The target area doesn't need to be completely undefended for your attack to
be successful. If your opponent only has one or two defensive towers guarding your target area,
don't let them deter you. Having a mass of Overlords when you Drop will ensure that those light
defenses will not be sufficient to block the brunt of the attack. If you have any flying units available,
use them to distract the defenses. Immediately follow up with the Drop and pull back the aerial units.
If you have no flying units available, just use a lone empty Overlord to serve as the decoy. The loss
of one Overlord is nothing compared to the loss your opponent will feel in a successful Drop.
|
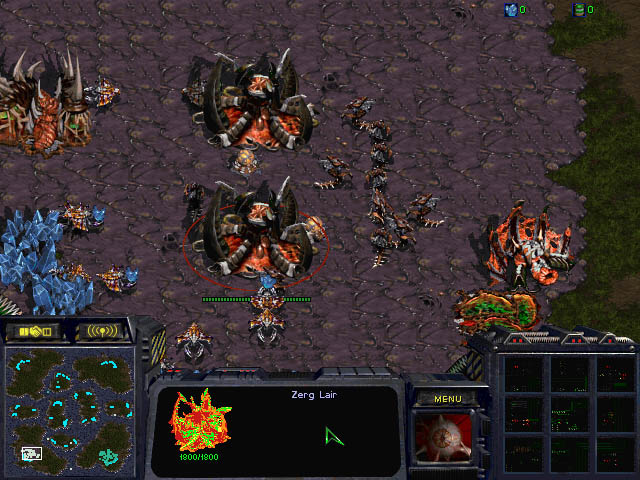
In this shot 5 Hydralisks await transport while the Overlord prepares to load and go as
soon as the Ventral Sacs are evolved. Once the Overlord has the transport ability, the Hydralisks can be
quickly loaded and the Overlord sent on its way without wasting any time.
|
|
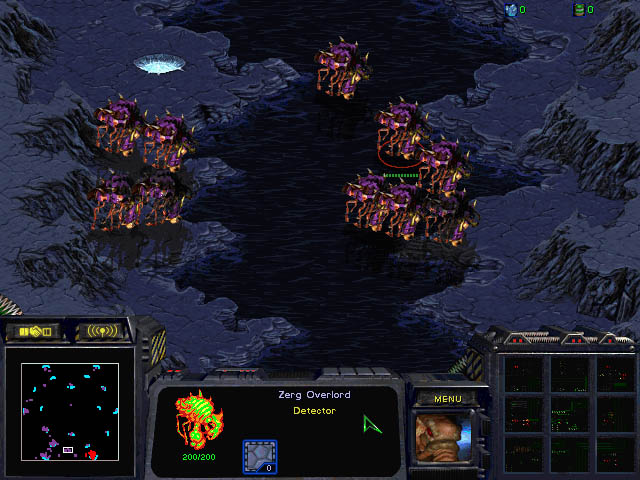
If the enemy base is heavily fortified from all sides but feel that a Drop is necessary to claim victory, there are two options:
use a masssive overwhelming Overlord drop complete with decoys and diversions or use a stream of Overlords for a quick drop. The first option
is probably the best solution, but in some cases where you are tight on resources, you might want to opt for a quick drop. This
involves keeping your Overlords on the move at all times. The idea is to command your Overlord to move to the target drop location
and have a return location queued up for a quick turn around once the Overlord reaches the drop spot.
To do this, select your Overlord,
right click on the area you wish to drop on, then hold down Shift and right click on a return location.
Once you have the flight path set, keep the Overlord selected on its run and as soon as the Overlord reaches the drop location, quickly
click on the top left wireframe of the units the Overlord is carrying. (Keep clicking on that wireframe until all the units have been
dropped). This will not disturb the Overlord's flight instructions and will drop the units while the Overlord remains moving. Note that
this requires a bit of micromanagement and if you need to drop more than one Overlord's worth of units, you'll need to be very quick
with Overlord selection and unit dropping. This tactic will move your Overlord into and out of trouble as quickly as possible and
requires some practice. But successfully used, it can be a very effective at dropping ground forces with a minimum of loss.
Lurker Drop
One of the best units for a drop is the Lurker. With their ability to burrow and attack, they make the perfect choice
for a quick infiltration and destroy mission. Their Subterranean Spines can quickly raze any nearby stationary detectors.
Once the enemy no longer has detectors available, the Lurkers will have free reign over the area. To help keep the area
clean of detection, bring a few Scourge along with the Overlords in the Drop. They quickly clear out any Observers,
Science Vessels, or enemy Overlords nearby.
|
|
|
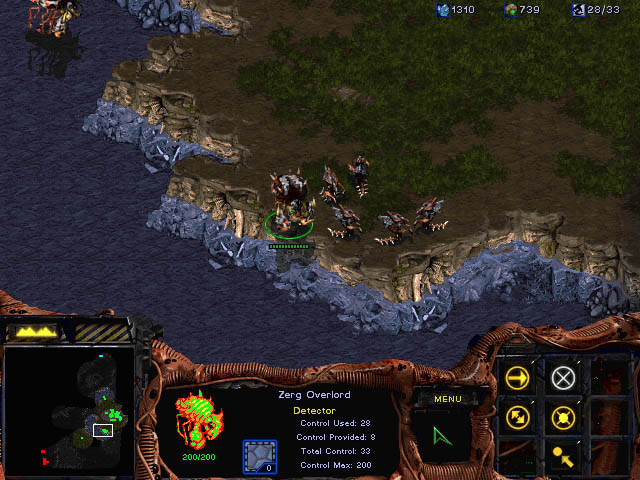
[ Click to Enlarge - 104 KB ]
Overlords move in to drop Lurkers.
|
[ Click to Enlarge - 104 KB ]
Lurkers unload from Overlords.
|
|
|
|
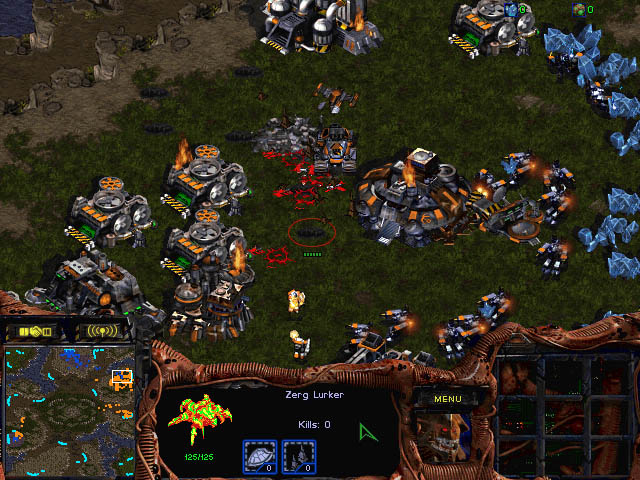
[ Click to Enlarge - 107 KB ]
Lurkers Burrow and begin attacking town.
|
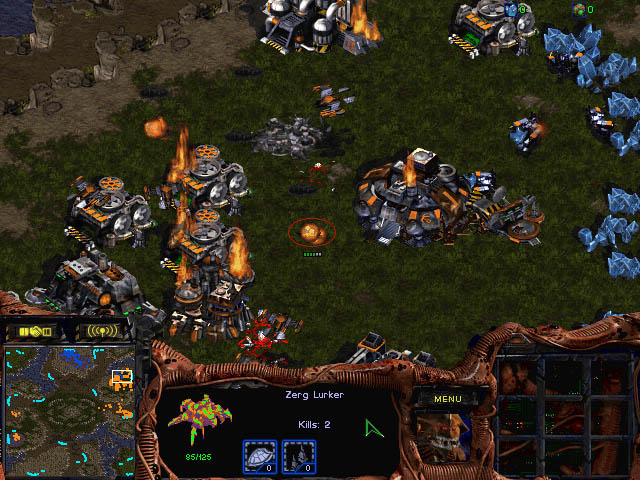
[ Click to Enlarge - 103 KB ]
Wraith attempts to attack Lurkers.
|