Zealots
Zealots are the earliest attack unit available for the Protoss. While they are relatively expensive,
Zealots can cause massive damage in melee combat. Zerglings can defeats Zealots if the Zerglings
outnumber the Zealots at least 4 to 1. This ratio can vary depending on upgrades and terrain. Should
you choose to face Zealots with Zerglings be sure to group them together before attacking. If a group
of Zealots catches a mass of Zerglings streaming in single file rather than as a massive wave, the
Zealots can take out more Zerglings than you might think. Also try to separate the Zealots apart to
allow more Zerglings to attack each individual Zealot. For Zerglings to remain effective you should
upgrade their Carapaces. If the enemy Zealots have an attack upgrade advantage, a Zealot will rip a
Zergling apart in two attacks instead of three.
If Hydralisks are used to back a Zergling attack, the Zealots fall much more quickly. Be sure to evolve the
Grooved Spines (increased attack range) upgrade. The additional range will allow more Hydralisks to
engage the enemy. Keep in mind that to keep the edge over Zealots, you'll need superior numbers in
both Zerglings and Hydralisks. Use multiple Hatcheries to maintain those numbers.
When defending against Zealots at your home colony, have Sunken Colonies built to aid in the defense.
Tie up the invading Zealots with Zerglings and let the Sunken Colonies hit the Protoss from range.
In the mid to late game, use Mutalisks and Guardians to make short work of the Zealots (which are unable
to retaliate against air units). Lurkers can also help tip the odds in your favor. Should the Zealots lack the
support of a nearby Observer or Photon Cannon, they are easy prey for the Lurker's Subterranean Spines.
|
|
[ Click to Enlarge - 88 KB ]
Sunken Colonies and Zerglings defend the Hive against a Zealot attack.
|
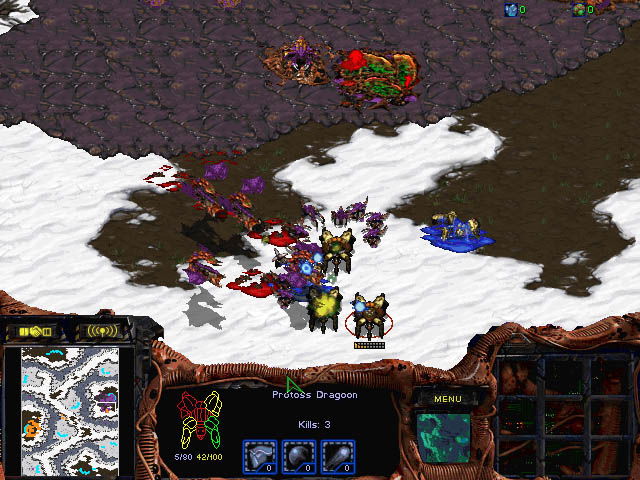
Dragoons
Although the Dragoon's ranged attack power should not be underestimated, they are relatively
easy fodder for Zerglings upgraded with Metabolic Boost (faster movement) and Adrenal Glands
(faster attack rate). The Dragoon's slow attack is no match for a frenzied horde of Zerglings.
Unless the Dragoons have the advantage in numbers, the Zerglings will almost always prevail.
Use Hydralisks to help speed up the process of dispatching Dragoons wherever possible.
In the later stages of a game, use Guardians and the Queen's Spawn Broodling to destroy Dragoons
from long range. Lurkers also make a great weapon against Dragoons. With their long range splash
attacks, the Lurkers can quickly shred a group of Dragoons before they can realize what is happening.
|
|
[ Click to Enlarge - 98 KB ]
Mutalisks and Zerglings team up against a group of Dragoons.
|
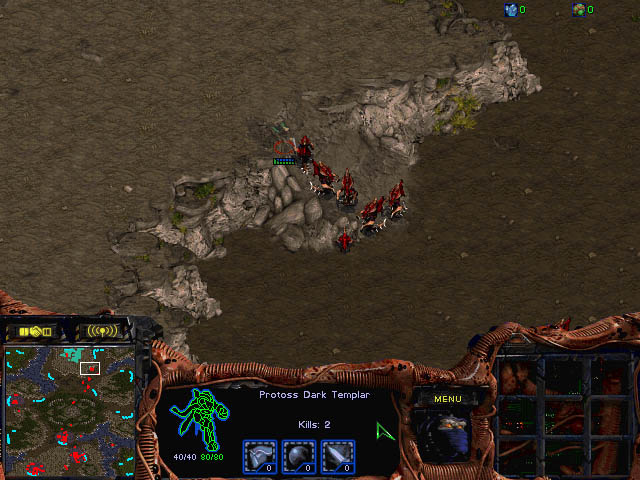
Dark Templar
When faced with Dark Templar, the Overlord becomes the key unit to defeating them. Make
sure the Overlord has the Pneumatized Carapace (faster movement) and Antennae (increased
sight range) upgrades to unmask any Dark Templar that may be roving around. The Dark Templar
melee attack is extremely deadly to any Zerg ground unit, but the attack is thankfully slow.
Zerglings and Hydralisks can defeat Dark Templars, but expect casualties. If available, use
Mutalisks or Guardians to attack from above. The Dark Templar has no response to an attack
from the air. If there are no Overlords nearby, use the Queen's Ensnare or the Defiler's Plague to
reveal the Dark Templar. Your forces can then quickly dispatch the marauding assassins.
If you suspect your opponent will use these warriors, build a few Spore Colonies at each of your
bases to provide an additional layer of detection. Keep them surrounded by Sunken Colonies to
help repel attacks. To further bolster base defenses, keep a few Lurkers burrowed around your
important base structures and mining operation..
|
|
[ Click to Enlarge - 81 KB ]
Dark Templars can prevent an entire assault by themselves. Be sure to bring an Overlord with you before
attacking.
|
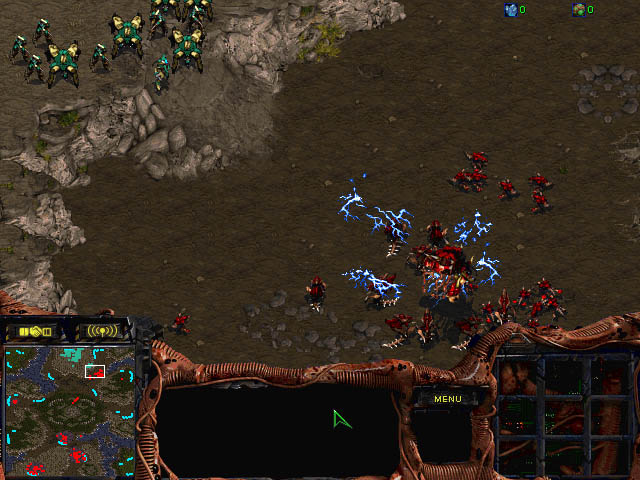
High Templar and Psionic Storm
The deadliest weapon the Protoss have at their disposal is the High Templar's Psionic Storm.
Even just one Templar with Psionic Storm can wipe out masses of Zerg units with little effort.
Psionic Storm can often be the deciding factor in a Protoss vs. Zerg encounter. Destroy any
High Templar on sight, keep your units spread out, and hope that you can destroy them before
they have sufficient energy to unleash a Psionic Storm.
One of the quickest and safest methods of exterminating High Templar is the Queen's Spawn
Broodling ability. Spawn Broodling has a long range, and one Queen can instantly kill a single
Templar. Before you attack is usually the best time to use this ability. With the Templar safely
eliminated, your ground and air forces can quickly take advantage of the situation to mount an
effective attack.
Since Zerglings are so cheap and easy to produce, they also make a good tool for targeting and
destroying enemy High Templar. Even if hit by a Psionic Storm, the Zerglings can easily be replaced.
If even one Zergling can reach a defenseless Templar, then the sacrifice will be well worth it.
Ultralisks also serve as an excellent countermeasure for High Templar. The immense vitality
of an Ultralisk will keep them alive through multiple Psionic Storms. Any High Templar is
as good as dead once an Ultralisk reaches him.
Avoid using Mutalisks or Guardians to attack High Templar unless you're sure the Templar have
run out of energy. Psionic Storms will ravage stacked groups of Mutalisks with great efficiency,
and Guardians are too slow to move out of the Psionic Storm before taking extreme damage.
|
|
[ Click to Enlarge - 82 KB ]
Grouped Zerg units make perfect targets for a Psionic Storm.
|
Reavers
Reavers are a very powerful threat to Zerg ground forces and should be handled with extreme
caution. Should you be caught in a situation where you need to destroy them, the best unit
for the job is the Mutalisk or Guardian. If neither unit is available, you should instead use a
combination of Zerglings and Hydralisks to take the Reavers out.
The key to destroying a Reaver is taking advantage of its slow firing rate and the Reaver's tendency
to attack the first unit to enter its acquisition range . Use Zerglings one at a time and place them in
front of the rest of the attack group. These Zerglings will act as bait to draw the fire of the enemy
Reavers. As soon as the Reaver fires and destroys the decoy, rush in immediately with the rest of the
Zerglings and Hydralisks to destroy the Reaver during its cooldown cycle. Try to arrange the Zerglings
so they completely surround the Reaver and don't let your Zerglings cluster at the front of the Reaver.
If the Reaver does manage to fire another Scarab, that one shot could kill every attacking Zergling.
If you don't have any Zerglings around to deal with the Reaver, use the same decoy strategy with your
Hydralisks. Send one in front of the rest of the group as cannon fodder, then quickly follow up the decoy
with the rest of the group. Between Reaver cooldown cycles, spread your Hydralisks apart and attempt to
surround the Reaver. If your Hydralisks do take fire from the Reaver, at least they'll only die one at a time
rather than in entire groups.
|
|
|
[ Click to Enlarge - 92 KB ]
Reavers can be very damaging to groups of Zerglings and Hydralisks. Surround and separate for the best chances
of defeating a Reaver.
|
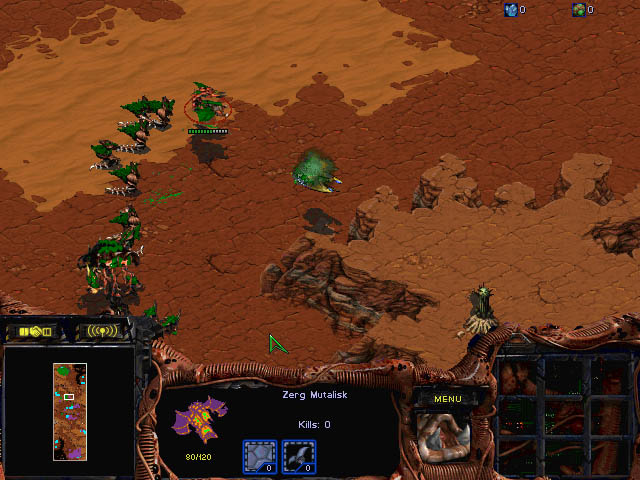
[ Click to Enlarge - 87 KB ]
Mutalisks should be used when Reavers have no anti-air support.
|
Reaver and Zealot Drop
A favored Protoss tactic is the Reaver or Zealot Drop at the back door of a Zerg Colony.
To counter this strategy, build a few Spore Colonies to destroy the incoming Shuttle and
a few Sunken Colonies near your Drones gathering resources. If available, also place a few
Lurkers around the workers. Lurkers will almost always take a Reaver or Zealot Drop by
surprise, and the Lurkers can destroy the dropped force in short order. Scourge also make a
very good deterrent to drop attempts. Place a few Scourge around the back edge of your colony
and order them to patrol around your resources. With luck the Scourge will surprise any incoming
Shuttle and destroy the invaders before having the chance to unload.
Scouts
The Protoss Scout is one of the deadliest air to air combat units found in the game. Once
upgraded with Gravitic Thrusters (faster movement) they can challenge any air force for
control of the skies. They can also hit ground targets, making Scouts a very well rounded
unit able to serve many purposes. To counter this threat you'll need to significantly outnumber
the Scouts with Mutalisks, Scourge and Devourers, or use smaller groups of those units in
combination with some of the Zerg special abilites.
If you have Queens available, use Ensnare to slow down the Scouts then hit them hard with your
air units and any ground forces in range. Defilers can both Plague the Scouts or provide Hydralisks
with the cover of a Dark Swarm.
Remember to not allow the Scouts to escape. If they can retreat back to a Shield Battery or two,
the Scouts can quickly rejoin the battle at full strength.
Corsairs
Like the Scout, the Corsair is also an air-to-air superiority fighter. Groups of Corsairs can make very
quick work of large groups of Mutalisks, and they also make extremely efficient Overlord hunters. The
Corsair's strength lies in their fast firing splash damage attack and their fast movement. Use the Queen's
Ensnare to take away their speed advantage. Then use Hydralisks to destroy the Corsairs. If you have
any Devourers available, use them to attack the Corsairs and increase their cooldown. Once their firing
rate is crippled, use Mutalisks and Scourge to finish them off one by one.
If you have neither Ensnare or Devourers to counter the Corsair, be prepared to flee. Mutalisks stand no
chance against Corsairs unless in grossly superior numbers. The only chance for survival is to spread apart
and surround the Corsairs, limiting the splash damage done by the Corsair's attack.
Keep Overlords within Spore Colony protection and if you notice any Corsairs about, bring all of your
Overlords into the safe haven of Spore Colonies. Be sure to bolster the Spore Colonies with Hydralisks
since Spore Colonies alone cannot hope to fend off a sizeable force of Corsairs, especially if the Corsairs
have Disruption Web available.

|
|
[ Click to Enlarge - 76 KB ]
A Zerg player sets a trap for an enemy Corsair.
|
Observers
Observers serve as the eyes and ears of a Protoss commander and should be destroyed on sight.
Use Overlords to detect their presence, then use a single Scourge to destroy the Observer before
it can escape. Killing Observers on sight will help prevent the enemy from spying on you, and also
help make your Lurkers and other burrowed units more effective.
Archons
Archons are the physical manifestations of Protoss psionic might and are deadly to tightly packed
groups of units, particularly Mutalisks. Lone Archons do not present too much of a problem, but in
groups Archons become a definite threat to the Zerg.
Use Guardians to attack from afar, but don't make the mistake of approaching them over open ground.
If the Guardians come within Archon attack range, they can be ravaged as easily as the Mutalisk. If
you have no Guardians available, use Hydralisks and Zerglings in sheer numbers to overwhelm them.
Archons are immune to the effects of Spawn Broodling and are nearly immune to the effects of Plague
and Dark Swarm. Ensnare can be used to slow the Archons down, and their slowed approach can allow
your Guardians and Hydralisks more firing opportunites before the Archons finally close to their own firing
range.
Dark Archons
The enigmatic Dark Archons are not seen too often, but when they are, be very wary. The Dark Archon
possesses an arsenal of abilities that can wreak havoc on the Zerg ranging from the immobilizing Maelstrom,
the Queen and Defiler killing Feedback, and the all powerful Mind Control. Maelstrom can stop any Zerg unit
in its tracks for a few moments, allowing nearby enemy Protoss units to hammer your forces. Feedback can,
depending on the target unit's energy stores and vitality, instantly destroy a Queen or Defiler by turning the unit's
energy against itself and creating a fatal backlash. The most feared ability of the Dark Archon is Mind Control.
The Dark Archon can instantly remove a Zerg force's detection support if an escorting Overlord is Mind Controlled.
Even worse, should a Dark Archon capture and whisk away a Zerg Drone, the Protoss can build an entire Zerg
brood under their control.
All these threats make the Dark Archon a unit to be feared. However, the Dark Archon has no means of physically
protecting itself. Should its energy stores be depleted, the Dark Archon becomes a very vulnerable target. Use
Zerglings, Hydralisks, Mutalisks or Guardians to quickly dispatch a Dark Archon whenever possible.
Carriers
Carriers are always a threat when they come into play, but the Zerg have the means to take care of them.
Hydralisks beneath a Dark Swarm can do wonders against Carriers, but be sure to target the Carriers and
not the interceptors. If the Interceptors can be distracted, Scourge can make excellent Carrier killers. Only
5 Scourge will take out one Carrier.
Countering Shield Battery Tactics
The Protoss have no means of repairing or health regeneration. However, they can quickly recharge their
Plasma Shields with the aid of a Shield Battery. Many Protoss lives are saved with the use of these Shield
Batteries and the Zerg should be wary of their use. When invading a Protoss establishment, keep a watchful
eye out for Shield Batteries. Should you decide to invade, make sure you have enough units to overwhelm the
Protoss even if they recharge their Shields during the battle.
Scouts are notorious for being avidly used in conjunction with Shield Batteries. They can quickly strike a Zerg
base, retreat to recharge, then return to the frontlines for more combat. To prevent this type of tactic, attack the
Scouts with Mutalisks, Devourers or Hydralisks at an angle that blocks their escape route to a Shield Battery.
Hopefully you can destroy the Scouts before they can retreat back to safety.
Online Privacy Policy
Battle.net Terms of Use Agreement
©2019 Blizzard Entertainment. All rights reserved.
|