Overview |
Heroes and Units |
Unit Stats |
Tech-tree |
Voodoo Lounge |
Building Stats |
Basics |
Advanced |
Combos |
Defeating Orcs
Heroes:
Blademaster |
Far Seer |
Tauren Chieftain |
Shadow Hunter
Units :
Peon |
Grunt |
Troll Headhunter |
Troll Berserker |
Demolisher |
Shaman
Witch Doctor |
Spirit Walker |
Raider |
Kodo Beast |
Wind Rider |
Troll Batrider
Tauren |
Spirit Wolf |
Dire Wolf |
Shadow Wolf |
Serpent Ward
Unit Index |
Orc Index
|
|
|
 |
 |
Though their numbers are few, the seasoned Blademasters represent an elite fighting force within the Horde. These skilled
swordsmen were once part of the ill-fated Burning Blade Clan which consumed itself in the throes of Demonic
corruption. With their Clan scattered and broken, the proud Blademasters swore a grim oath to free themselves
and their brethren from Demonic control once and for all. Under Thrall's command, the Blademasters have
once again joined the Horde and serve as the young Warchief's personal honor guard.
|
|
|
 425 425
 100 100
 5 5
|
| Hero |
| Normal |
| Hero |
| None |
| 1.77 |
| Melee |
|
|
| Agility |
| 2 |
| 1.75 |
| 2.25 |
| Always |
| .01 |
|
|
|
| 1 |
26-48 [37 avg]/None |
5 |
18 |
24 |
16 |
550 |
240 |
| 2 |
27-49 [38 avg]/None |
6 |
20 |
25 |
18 |
600 |
270 |
| 3 |
29-51 [40 avg]/None |
6 |
22 |
27 |
20 |
650 |
300 |
| 4 |
31-53 [42 avg]/None |
7 |
24 |
29 |
22 |
700 |
330 |
| 5 |
33-55 [44 avg]/None |
7 |
26 |
31 |
25 |
750 |
375 |
| 6 |
34-56 [45 avg]/None |
8 |
28 |
32 |
27 |
800 |
405 |
| 7 |
36-58 [47 avg]/None |
8 |
30 |
34 |
29 |
850 |
435 |
| 8 |
38-60 [49 avg]/None |
9 |
32 |
36 |
31 |
900 |
465 |
| 9 |
40-62 [51 avg]/None |
9 |
34 |
38 |
34 |
950 |
510 |
| 10 |
41-63 [52 avg]/None |
10 |
36 |
39 |
36 |
1000 |
540 |
|
Hero Names: Tojara, Nikoro, Kajind, Mikasa, Samuro, Akinos, Mazuru, Yozshura,
Daisho, Kigami, Arashicage, Moogul the Sly, Jubei
The Blademaster is a favorite Hero of many Orc commanders. The Blademaster is one of the most
powerful melee Heroes when combined with Mirror Image and Critical Strike. Blademasters can quickly
destroy enemy units and buildings when they are powered up with items and levels. The Blademaster's
greatest advantage is Mirror Image, which confuses the enemy and focuses their attention on fake
copies of the Blademaster. Critical Strike allows the Blademaster to do very high damage attacks.
Wind Walk can allow the Blademaster to go invisible and run away when he's about to die or sneak
into enemy towns. The Blademaster's Bladestorm ultimate ability can do serious damage.
There are many point spending strategies with the Blademaster. Typically players first place points
in Mirror Image and then place points in Critical Strike. But other players who wish to Hero rush
or do hit and run attacks in the enemy towns or against Creeps sometimes place their first point
in Wind Walk then follow in Critical Strike.
Buy up items at the Goblin Merchant and Marketplace to further enhance the Blademaster's power.
Blademaster Counters
Use Dispel on the Illusions or find out which is the real Blademaster and focus your attacks on
him. Ranged units with focused fire work very well against Blademasters once you find the real one.
Cast silence on Orc Blademasters. They won't be able to Wind Walk, Mirror Image or use
Bladestorm.
 |
Allows the Blademaster to become invisible, and move faster for a set amount of time. When the Blademaster attacks a unit to break
invisibility, he will deal bonus damage.
|
| 1 |
20 sec. |
5 sec. |
75 |
N/A |
Personal |
Self |
Invisible, +10% movement speed, 40 bonus damage |
1 |
| 2 |
35 sec. |
5 sec. |
75 |
N/A |
Personal |
Self |
Invisible, +40% movement speed, 70 bonus damage |
3 |
| 3 |
50 sec. |
5 sec. |
75 |
N/A |
Personal |
Self |
Invisible, Max Movement Speed, 100 bonus damage |
5 |
|
Wind Walk Information
Use Wind Walk to get away when the Blademaster is about to die.
Use Wind Walk to scout the map without being attacked. You can walk into an enemy town, look around, then leave.
Use Wind Walk to sneak into an enemy town or upon stopped collections of enemy units and do a Bladestorm.
Wind Walk can be used for soloing Creeps at the start of the game. A cool trick is to run into a group of Creeps,
kill the leader to get the best items, grab the items, then go invisible using Wind Walk.
The Blademaster can use Wind Walk early in the game to use Fountains of Health, Fountains of Mana, or other
Neutral buildings while they are still being defended by Creeps.
The Blademaster can wake up a bunch of Creeps, and then lead them to the enemy. The Blademaster can then use
Wind Walk to become invisible giving the Creeps a new target, that enemy player.
Because Hero Speed is capped at 400, the Blademaster is not able to advance beyond 400 speed. 400 is
reached with Level 2 Wind Walk. The Blademaster's speed does not increase after level 2. The main benefit of reaching
level 3 is for the longer duration.
Wind Walk can be used to walk through units.
Wind Walk Counters
Detect Invisibility.
This is a popular strategy where players use a Blademaster to do hit-and-run attacks. This strategy is easily beaten
with many abilities or items including Dust of Appearance (Night Elf Shop), Dark Ranger's Silence (to prevent Wind Walk),
Priestess of the Moon's Scout ability, and other abilities that reveal invisible units. In team games Dust is the easiest.
 |
Confuses the enemy by creating illusions of the Blademaster and dispelling all magic from the Blademaster.
|
| 1 |
60 sec. |
3 sec. |
125 |
N/A |
N/A |
N/A |
Creates 1 illusion |
1 |
| 2 |
60 sec. |
3 sec. |
125 |
N/A |
N/A |
N/A |
Creates 2 illusion |
3 |
| 3 |
60 sec. |
3 sec. |
125 |
N/A |
N/A |
N/A |
Creates 3 illusion |
5 |
|
Mirror Image Information
Mirror Image is a very effective spell because it breaks
target lock and creates a duplicate of the Blademaster. Enemy players are often unable to tell which is the real Blademaster.
The Blademaster can concentrate and create alternate illusions of himself.
The player can discern the illusions graphically, but opposing players see
an exact duplicate. The illusions have the same hit points as the Blademaster, but no special abilities. Illusions can attack, but do no damage.
When attacked, the Illusion takes double damage.
Each casting dispels your previous images. Mirror Images are created at "current" hit points, to make it more difficult to
detect the images. Mirror Images appear to level when the parent Blademaster levels. Mirror Images appear to get
Critical hits.
At level 1 you can only summon one Mirror Image. You cannot summon more than 3 Mirror Images.
Use Mirror Images to scout the map since it doesn't matter if you lose them. You can use a Mirror Image to spy on the enemy or scout
for expansions. It's better to scout at night since the Mirror Images will not be attacked by Creeps.
Mirror Image can help the Blademaster become unstuck when he has become trapped by Entangling Roots or Ensnare. If you are rooted, use Mirror
Image to break free. This can also be used when the Blademaster has been trapped by enemy units surrounding him.
It's important to control all of your Mirror Images when attacking. If you only control the REAL Blademaster and leave
the Mirror Images alone attacking "wrong" things, the enemy might pick up on which one is the real Blademaster and which are
the imposters. If the enemy figures out which is the real Blademaster, cast Mirror Image again to mix them up.
|
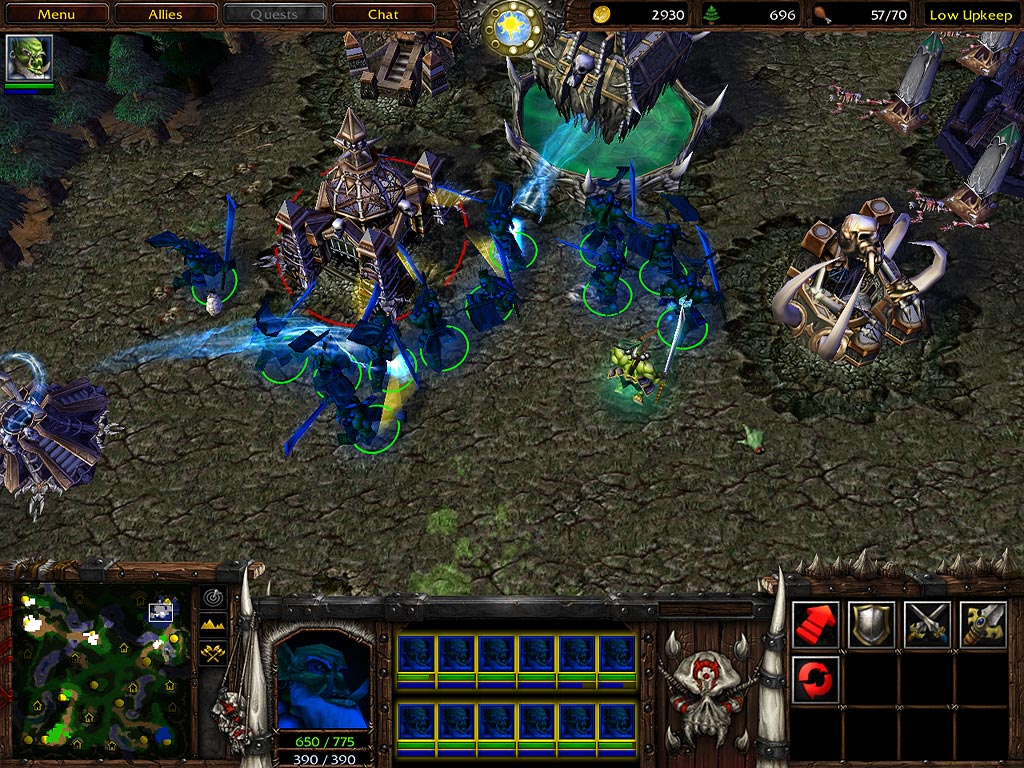
|
[ Click to Enlarge - 248 KB ]
An Undead player is shocked to find an army of Blademasters in their town. These many Illusions were
created by Mirror image and several Wands of Illusion.
|
Mirror Image Counters
If you are trying to identify which is the real Mirror Image, hold down alt and watch the HP bar of the Blademaster being attacked
and watch the hit points go down. Mirror Images take more damage so if you notice the hit points dropping quickly instead of slowly, it's not the real Blademaster.
You can often tell which is the real Blademaster by which Blademaster the enemy controls the most or how the enemy seeks out specific targets with
only one of their Blademasters. If the enemy is smart they will try to fool you but average players won't have these skills.
If you can't figure out by how they are controlled, use the hit point method instead.
You can use dispel to damage Mirror Images.
Player Submitted Tip
When countering Mirror Image, if you hold down alt and watch to see the
timing of the Blademasters' attacks with the timing of damage applied to
your building/unit, it is quite easy to determine which one is real. This
works better when with a hero rush or any time there are only a few units
attacking, otherwise there may be too much going on to differentiate damage
dealt by the Blademaster from that of other units. - BigPossum on Azeroth
 |
Gives a 15% chance that the Blademaster will do more damage on his attacks.
|
| 1 |
Unlimited |
N/A |
N/A |
N/A |
N/A |
Self |
2 times normal damage |
1 |
| 2 |
Unlimited |
N/A |
N/A |
N/A |
N/A |
Self |
3 times normal damage |
3 |
| 3 |
Unlimited |
N/A |
N/A |
N/A |
N/A |
Self |
4 times normal damage |
5 |
|
Critical Strike Information
There are few players that pass up Critical Strike. Critical Strike can allow for some very high
damage attacks as the Blademaster gets equipment and levels.
Red numbers will float around the Blademaster indicating that you have made a Critical Strike and how much
damage that Critical Strike was.
Critical Strike does not work on buildings.
Critical Strike does not receive damage from the Keeper of the Grove's Thorns Aura. However, the Blademaster's base attack
associated with a Critical Strike still interacts with Thorns appropriately.
 |
Causes a bladestorm of destructive force around the Blademaster, rendering him immune to magic and dealing 110 damage per second to
nearby enemy land units.
|
| N/A |
7 sec. |
180 sec. |
200 |
N/A |
N/A |
Ground, Enemy, Neutral |
110 damage per second |
6 |
|
Bladestorm Information
The Blademaster is not invulnerable while casting Bladestorm, but has Spell Immunity.
Bladestorm does equal damage to all of the units in its area.
Bladestorm is great against low hit point buildings such as Towers and Farms. Use it on a group of lined up
buildings to quickly destroy them. You can use them on any buildings you want to kill quickly.
It's best to use Bladestorm against units that are all lined up. The enemy will typically (if they are good) start running away from the
Bladestorm which means you will have to control it very carefully so the Blademaster is always attacking something.
Before using Bladestorm make sure there isn't anything in the way that will prevent the Blademaster from reaching
the enemy while he's doing his Bladestorm. A common mistake is to cast Bladestorm then to become trapped, unable
to reach the enemy before the timer runs out.
Bladestorm Counters
The best defense against Bladestorm is to run away until it is over.
|
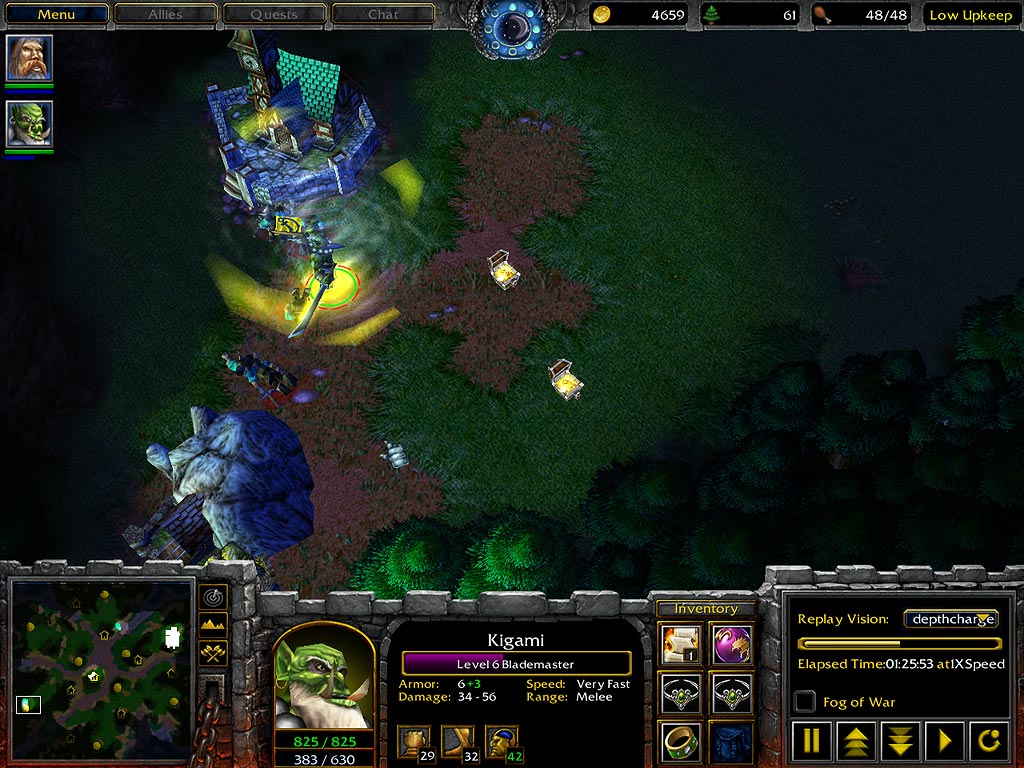
|
[ Click to Enlarge - 180 KB ]
Combine Bladestorm with Wind Walk. Go invisible and sneak up on stationary units or units that are lined up. Then cast a Bladestorm!
Bladestorm is great against workers mining Gold.
|
Online Privacy Policy
Battle.net Terms of Use Agreement
©2019 Blizzard Entertainment. All rights reserved.